Makeup Artist Certification

Module 20: Makeup for Seasons
Listen to the Module
What you will learn:
- Makeup for summer
- Makeup for winter
- Choosing makeup according to your clients' season
- Latest season trends
20.1 Introduction
 When it comes to makeup and the seasons, it is good to know the overall differences. However, the importance of this factor is really for those areas where the weather in the summer is very different from the weather in the winter. It is not as important for those areas where the temperature is constant or near constant year-round. When it comes to those hot summer days, it is important to create a look that is quick and easy. Nobody wants to waste any time applying makeup when they can be out there having fun.
20.2 Summer Sporty look
 This is perfect for a woman on the go. They want to be cute and neat while they are active. This look takes only about five minutes to apply and is perfect for a day at the beach and even photo shoots on the beach. Start with a face and body sunscreen with a high SPF of around 30 that is oil free. It should include protection against UVA and UVB rays. The use of a water-resistant shimmer is perfect for the shoulders and the face to create that glossy look. The application of the shimmer on the face should only be on the forehead, cheeks, chin, and nose areas. That way it can deepen the look of the tan. Cream eye shadow can be used next in a natural color for the entire lid. This can be applied with an eye shadow brush. A water-resistant mascara can be used to create the depth in the eyes. There are several colors that work great for the summer with this look when it comes to mascara. You can try the traditional black or get funky with some turquoise, blue, or green. Make sure that the mascara is waterproof.
Those with oily skin will benefit from a foam cleanser followed by a lightweight and oil-free moisturizer. Due to the increase in humidity, those with oily skin are prone to clogged pores during this time of the year, so a facial mask may be the solution to unclog pores and make them look healthy again.
Change a lip color or just use lip gloss for that perfect finish. To really enhance the look get your client to wash their hair with beer for extra shine or with champagne to make their highlights really stand out during this season.
20.3 Winter Makeup
 Cold weather leads to heated rooms and hot showers which can wreak havoc on your skin and dry it out. Dry skin is no good and it is so important to moisturize heavily during the winter to prevent it. When it comes to makeup in the winter, you need to start off with a moisturizer to lock in the moisture and keep your skin from drying out more. It is a good idea to apply a thicker foundation during the winter instead of a tinted moisturizer.
It is very common to have to use a lighter foundation in the winter for your client than you did in the summer because their skin is paler. Cosmetics companies usually launch their autumn collection of shades and lip colors that are darker. The idea is that they are pushing darker colors for the colder months. There is no exact science as to what colors to use; however, your clients will likely want to stick with the trends, so you should keep up with them. Use a tinted lip balm instead of a lipstick in the winter when lips are chapped and cracked. It will provide a sheen look that will make them look healthy and smooth instead of cracked and dry. The blush is an essential makeup tool for the winter. It will brighten up the face and prevent it from looking pale. Powdered blushes are perfect for the winter. Hands need to be moisturized. Apply some heavy moisturizer and sleep with cotton gloves on and your cuticles and fingers will be soft and fresh in the morning. During the winter months the humidity drops and the skin tightens and dries. This is the time to change the moisturizer to a more hydrating option that will feed the skin and give it the nutrients it needs. Choose warmer shades for winter makeup, something that will blend in with a winter wardrobe.
20.4 Essential Tips
 During autumn you will find that your clients' skin will start drying and tightening, so this is when you want to make the change and use a more hydrating moisturizer through to mid spring. You will find that summer and winter foundation colors will change. For most people there is at least one shade difference between what they use in summer to what they use in the winter. As the summer-kissed look starts to disappear, a client won't look good if you continue to use the same shade of foundation that you used for them throughout the summer. During autumn, stick to natural or nude shades. These work best during the transitional months of summer to winter.
20.5 Choosing Makeup According to Your Clients' Season
Every person is associated with a season. Knowing your client's season can ensure you use the right makeup tones. Knowing their season can also help them identify what colors they should wear to improve their overall look.
Determine Cool or Warm
The first step is to determine whether your client is considered a warm or a cool. This is probably the hardest step of the process. The focus of this exercise is to identify their undertone, and this goes beyond skin tone. The undertone is what defines looks; it is determined by genes and it never changes. The easiest test is the foundation test. Dab a touch of pink foundation cream on one cheek and a dab of yellow foundation cream on the other. Blend both in evenly and then identify which one looks properly blended and which one appears to be painted on. If the pink is the one that appears to be blended, then your client is a cool, but if it is the yellow that looks blended, then they are a warm. The next is the gold and silver test. Take a piece of paper or fabric in gold, and in silver, and hold it over an area of skin that is not exposed to the sun, the best place is the inside of the wrist. If it looks as though the skin blends in with the silver, then your client is a cool, but if it looks as though the skin blends in with the gold, then they are a warm. The final cool or warm test is just as easy to accomplish and you don't need anything to do it. All you have to do is look at the veins on the inside of your client's wrist. Do the veins appear bluer or greener in color? If they appear green, then your client is a warm, but it they appear blue then they are a cool. Cool means that your client is a summer or a winter type while warm means that they are an autumn or a spring type. Which brings us to the next step of the identification process. You are now going to have to identify light versus dark to get a true understanding of what season your client is. If your client has dark eyes and hair and you have already identified that they are a cool, then they are considered a winter.
If your client has dark hair and eyes and you found that they were a warm undertone, then your client falls into autumn. They are a spring with light hair and eyes and a warm undertone. Now you can use this information to identify what is the best color palettes to use when it comes to makeup to ensure the best overall impression and outcome. If your client is a winter, then you are going to want to concentrate on pinks, blues and reds for their color palette. Don't use pastels - this will not enhance their look - and also avoid oranges, golds and beige when choosing the best colors to use. In the event your client is summer, then you can use pastel colors and neutral tones to enhance their makeup. Pastel blues and pinks combined with natural tones are ideal for anyone who falls into this season.
The final one is spring, this is a chance to work with warm colors, golds, yellows, and peaches. You can use these colors throughout the year, just working them differently to ensure that they provide the results you are looking to achieve.
20.6 Latest Season Trends
 Makeup trends are constantly changing and it's important as a makeup artist that you stay updated with the latest trends, see what is being worn on the red carpet and on the catwalk and incorporate it into what you do each day. Often, you will find that the latest trends appear way before the season, so you can start stocking up before the season starts. This means you can use new color trends with client's requests to create a perfect finished product with ease. The benefit of staying updated with the latest trends is that you always know what is coming, you can anticipate the colors and styles your client is going to ask for and you can ensure that you meet their needs, improve your service and show your passion every time you see them. Being passionate about what you do and knowing the season trends is essential in this line of business, enabling you to take these trends and incorporate them into your daily work with ease.
Module Summary
This module looked at the different makeup based on the seasons. It gave you an idea of what the main trends are for the application of makeup in both the summer and the winter. You should now know what to do for different seasons in terms of application along with determining whether your client is a warm or cool person. Knowing your client's season can help you identify the best colors to work with to provide the best results. The module also detailed the benefits of staying updated with the latest trends in season makeup to ensure you always provide your clients with the best finished product at all times.
Learning Topics
- Overview of beauty and makeup artistry
- About lips, eyes, lashes, and skin
- Psychology behind the use of makeup
- Modern makeup artistry trends
Learning Topics
- The history of makeup
- The use of cosmetics in ancient times
- The timeline of events in the evolution of makeup
- Makeup and feminists
Learning Topics
- What a beauty makeup artist does
- What this career path entails
- What working conditions for makeup artists are like
- Which industry careers are available to you
Learning Topics
- The skin's anatomy
- The function of the skin
- Skin care products and techniques
- What you can do to improve your client's skin problems
Learning Topics
- Tools that makeup artists use
- How to identify a good brush
- How to care for your brushes
- How to choose the right ones for various applications
Learning Topics
- A more detailed account of how to use makeup artist brushes
- Identify what qualities to look for in brushes
- Know the importance of density, length and shape of the brush
- Tips for effective application
Learning Topics
- Knowing how to choose the right foundation
- Know about tinted moisturisers
- Identify what other products you will need
- Applying the foundation
Learning Topics
- How to use corrective makeup
- Tips for corrective makeup applications
- Essential corrective makeup tools
- How to use various products
Learning Topics
- Various makeup styles
- How to decide on an angle
- Daytime looks
- Night-time looks
Learning Topics
- How to apply eye makeup
- Different eye shapes and how to correct them
- Get to know common eye makeup mistakes
- List of eye makeup tools you cannot be caught without
Learning Topics
- How to apply eyeliner
- The most common eyeliner styles and how to accomplish them
- The most common eyeliner mistakes
- Eyeliner types and how to use them
Learning Topics
- How to groom the eyebrows
- The benefits of eyebrow grooming
- The biggest mistakes you can make
- How to fix problems when grooming brows
Learning Topics
- How to add fake lashes into your looks
- How to apply fake lashes
- What you need to know about false lashes
- Common application mistakes and how to fix them
Learning Topics
- How to apply cheek color
- What you need to know about cheek color
- Types of blush and when to use them
- Cheek color based on face shape
Learning Topics
- How to apply lip color
- Tips for lip color application
- Benefits of using lip color
- Common mistakes when applying lip color
Learning Topics
- About recent beauty trends
- Lip trends
- Eye trends
- Hair trends
Learning Topics
- About various types of makeup that can be used in television, film, and magazines
- Overview of basic makeup
- How to emphasize features
- Character makeup
Learning Topics
- How to match makeup and hair
- Types of looks
- Makeup based on hair color
- Working with hair stylists
Learning Topics
- Maintaining radiant skin
- Important steps
- Essential tips and advice
- Essential vitamins and minerals for radiant skin
Learning Topics
- Makeup for summer
- Makeup for winter
- Choosing makeup according to your clients' season
- Latest season trends
Learning Topics
- About advanced techniques of makeup application
- Some useful tips you can rely on
- Step-by-step guide to contouring
- Essential eye techniques
Learning Topics
- Managing your salon
- Tips for working with product companies
- Money management
- About health and safety
Module 4 : Skin Anatomy and Skin Care
skin care and skin products
the largest organ in the human body is the skin. it covers around 20 square feet of the human body Its main purposes are to protect the body from the elements and microbes, assist in the regulation of body temperature, and to allow for the sensations of cold, heat, and touch.The skin is often taken for granted, but it plays more of a role in the body than you might realize, helping to protect you each and every day.
It consists of three layers:
: Epidermis
: Dermis
: subcutaneous tissue
skin care
A baby's skin is smooth and soft, moist and wrinkle free, because it has not been damaged. Over the years, the environment can cause the skin to become tough and dry. The skin starts to lose its elasticity and smoothness. This causes sagging and wrinkled skin. By caring for the skin, you can slow down the harmful effects of the elements. It can leave the skin healthier and more able to protect the body against disease.
what to do to improve you and your clients skin
Make recommendations
Moisturize
Offer them water
Know the top products
Explain clearly
Use chemical exfoliators as they are better than physical scrubs
Remind your clients to remove makeup before bed or remove it for them properly after a shoot, event, or whenever possible
Water temperature( water tempure should be warm not to hot or to cold)
Relaxation
( if you notist that your clint stressed tell them that it is not good for the skin and to play relaxation music and light some candles, do not put the news on and just dont put the tv on at all)
Sleep
Sleep is very important for keeping tight and wrinkle-free.
Bad habits
Smoking, straws, and chewing gum are no good. They will cause those lines around the lips that age the face significantly. Use mints instead of gum. Use a water bottle that has a wide mouth to prevent the same type of mouth movement.
Act quickly
If a client has a blemish, let them know how to get rid of it as fast as possible. Mention that they should not under any circumstances try to pop a spot. It will only make it worse. It can lead to broken skin, bleeding, scarring, redness, and inflammation. Dab it with a little spot treatment cream (ideally one containing salicylic acid) a few times a day to reduce the inflammation.
4.5 understanding skin types
There are five skin types that you should understand. Looking at your client without any makeup on you should be able to identify their skin type, and this can help ensure you provide them with the best care and service moving forward. Knowing a client's skin type can help you make the right recommendations for products that will suit their skin type, ensuring that they take care of their skin now and moving forward.
differnt types of skin:
- Normal skin is a smooth and firm skin to touch. It should have small to medium sized pores and an occasional blemish. Overall, it is healthy skin.
- ry skin can be easily fixed and is very tight and may even be flaky. This is often due to lack of hydration. It is possible that dry skin will feel bumpy and rough to the touch.
- Oily skin is immediately visible with a shiny and wet feel. People with oily skin tend to have large and noticeable pores.
- Combination skin is often one of the most common skin types. This skin type will experience oily skin on their nose, chin and forehead, maybe even on their cheeks, but the rest of their skin appears to be normal tone.
- Sensitive skin. It is very important that you are aware which of your clients have sensitive skin. This skin type cannot use certain products as it immediately results in unwelcome reactions and irritation. When working with clients who have sensitive skin you will want to do a patch test before continuing with your appointment.

4.6 Effective skin care routine
You should be able to offer your clients advice and make recommendations. If asked, you need to have an effective skin care routine in mind which your client can follow with ease on a daily basis, incorporating it into their current lifestyle without any hassle.
Skin care experts recommend double cleansing. This involves using an oil cleanser to remove any oil-based impurities such as makeup and SPF creams, then a water-based cleanser, which breaks down water-based impurities like sweat and dirt. The next step is for your client to invest in a good toner. The toner will soften and calm the skin, while also hydrating and replenishing it. This should be followed by an exfoliator. The exfoliator is responsible for removing dead cells and leaving the skin soft and smooth. The last step for the morning is to use a moisturizer. This will soften the skin and keep it hydrated. It is important that the moisturizer comes with a sunscreen of no less than SPF15. In addition to this, you should recommend that your clients invest in a good night-time moisturizer which they add to their skin right before bed. This is often thicker in texture than a daily moisturizer. This will feed the skin and keep it hydrated as you sleep.
4.7 follow your adivice
You can't be taken seriously when you tell your client that smoking is a way to cause those wrinkles around the mouth if your hands smell of cigarette smoke. You are in the business of creating beauty and protecting youth. Therefore, you need to make sure that you follow your own advice. That means that you should try to drink a lot of water, remove your makeup every night, eat healthy, exercise, and more. When you live the life, it is so much easier to talk about it. In addition to this, you need to focus on your personal hygiene, ensuring your clothes are newly laundered and your hair is tied up appropriately. Ensure you take the time to apply your makeup each morning, otherwise your clients will never take you seriously as a makeup artist.
Module 5 : Tools Used by a Makeup Artist
5.1 Introduction
It is really hard to apply makeup properly without the right tools. In this module, we will cover which tools you need to take care of the various services for your client. We will give you an idea of how you can use these tools to make things easier. Furthermore, we will give you information about why you should choose various products and how to sort through the many choices out there to find the ones that are going to give the best results.
Over time you will find that you favor some tools more than others; this is down to personal preference.
It is advised to have that one tool that can complete the job with ease. Always ensure you have a backup in your bag, as when rushing between clients, it is so easy to accidentally leave a tool behind that you need for your next appointment.
Tools of the trade
Cleanse tone and moisturize. Identify skin type.
-
5.2 Identifying a Good Brush
A good brush for the application of blush, powder, or eye shadow is made of real hair. Brushes made of synthetic materials work best for lips, foundations, and concealers; however, you will find that these synthetic brushes are not good for makeup in the powder format. the bristles of these synthetic brushes will not be able to hold the makeup and they could cause your makeup to be blotchy and inconsistent. It is difficult to contour, blend, or smudge with synthetic brushes. The tips of real hair brushes are uncut and that makes them hold the powder better. Look for a handmade brush, which will be really effective for applying makeup in the powder format. These handmade brushes feel great on the skin and have the best results overall.
A good quality brush is guaranteed to provide you with the best results and it is worth spending the extra money to invest in your career and future from the start.
- Don't take shortcuts as you are not going to achieve the results you want in the long run.
5.3 Types of Makeup Brushes
Foundation Brush
For a finish that is seamless, apply the foundation to the center of the face. Then sweep it out towards the hairline. It can be used to smooth out cream and liquid foundation to leave it streak free. Also, it can be used to pat on concealer under the eyes.
Kabuki Brush
This is a big brush and that makes it great for applying powders and bronzer softly and evenly spreading it over the face. In the shape of a three, sweep the bronzer first along the temple, down the hairline, across the cheekbone, and then finally along the jawline. Twirl the brush in your hand and it can buff out the harsh lines.
Powder Brush
Use the bristles to dust the face evenly. It will diffuse the loose powders to give a color that is less concentrated. It won't smudge the foundation. It can also work great for blush. Sweep it along the line from the apples of the cheeks to the cheekbones.
Angled Blush Brush
With the blush, twirl the bristles on apples of cheeks. Hold at an angle, then glide along the cheekbones. The bristles are slanted and that makes it perfect for this application. You can also apply a contour powder below your cheekbones in a shade that is darker than your skin tone to emphasize your contours.
Concealer Brush
Pat the concealer on blemishes and the circles under the eyes. The rounded edges of the brush can reach the areas around the nose and eyes. It can also be used to fix up lipstick edges that are messy.
All-over Eye Shadow Brush
In a motion like a windscreen wiper, smooth the eye shadow back and forth over the eyelid to intensify the color. It will apply evenly. Use it to dab on some shadow under the lash line to make the eyes smokier.
Blending Brush
Grab the handle's tip and twirl it around in a circular motion in the crease of the eyes for a blended, soft look. It can also be used to blend a highlighter on the cheekbones, cupid's bow, or brow bones.
Smudge Brush
Use a kohl liner to line the lashes and then sweep this brush lightly from side to side. It will give you a sultry, smoky look. It can also work when you want to apply an intense pigment to the outer and inner corners of the brow bone or target the areas around the eye.
Angled Eyeliner Brush
Dip this brush in shadow, gel liner, or cream.Then hold it at an angle flush with the lash line. Drag from the inner corner of the eye, all the way along the lash line. Or use it with brow powder to define or fill in brows that look sparse.
Brow/Lash Brush/Comb
The comb is used to separate lashes that are clumpy, remove the excess mascara, and smooth brows that are messy. Use the brush to tame thick, messy brows by brushing up and out. Diffuse brow lines that have been filled in harshly. You can also use the brush to smudge the eyeliner a bit.
Fan Brush
Use to brush eye shadow that has fallen under the eyes. Stroke the face with highlighter, bronzer, blush, and powder. It will create a sheer and precise application. Another great use is to create the look of no makeup by dipping the ends in the mascara and then painting it on the lashes. It works well for hiding eyelash glue by applying a gel liner.
5.4 Caring for Brushes
It is important to wash all of your brushes with regukar soap and water. It will remove the oil, makeup, and waxes from the brushes.Most of the time, you can wash them at the end of the night and then they will be dry by morning, so that they can be used again. There are professional cleaners for brushes.You can spray your brushes with them before each use to disinfect them, sanitize them, deodorize them, and condition them.
If you dont wash them every night, you should at least wipe them down and then wash them a few times each week.
- You should not let your brushes go more than a week without washing them.
A simple spray of a cleaner and a good habit to get into. If you care for your brushes, and especially if you purchase ones with real hair, you should be able to keep the same brushes for decades.
5.5 Cotton Buds
There are so many uses for a cotton bud. They are a must-have makeup tool. They can be used to create a "smoky eye" or to smudge eyeliner. They are also great for cleaning up mistakes that are made so that you dont have to start all over again. They are disposable and clean so, as long as you keep them in a container that does not let germs and bacteria in, they are very sanitary.
- Ensure that you never use the same cotton bud on different clients.
Diposable products provide you with a hygienic solution, so take advantage of this and ensure that the item is thrown away once used to reduce the risk of accidentally using it on your next client without realizing.
5.6 Blotting Paper
This thin paper is used to reduce shine and can be applied to the area, such as, the eyelids, lips, or skin, and it will absorb the wax and oil and reduce shine. Wrap a single sheet of blotting paper over your beauty blender sponge. Then roll it on the skin. It will get into the small crevices in the face and get rid of a little bit of the oil. It will leave the sheen and is great to use instead of fingers that can deposit bacteria or oil into the skin.
5.7 Tweezers
These are an essential tool for any makeup artist. You can even clean them with the same cleaner as your brushes. Just spray them and wipe them down after each use. They are perfect for plucking the few stray hairs that would otherwise spoil your look. You can also use them to pluck any chin hairs or upper lip hairs, to perfect your masterpiece.
5.8 Sponges
Sponges are great for giving your foundation a natural look once you tap it in. You can use a triangle sponge to apply the foundation to the inner corners of your eyes. They can be thrown away after use to ensure that you don't spread bacteria or viruses. They will not be able to get washed with soap and water, so be sure to buy in bulk and save.
Beauty Blender
For a sheer and even cover, dampen, and dab on foundation. The broad side of the sponge can be used to smooth the product on your face. The tip of the sponge can reach into the creases that are around the client's nose or pinpoint the smaller areas. It can apply cream blush, remove extra product, or blend makeup lines that are harsh.
Cotton Powder Puff
These are great for applying a loose powder or to cover larger areas of the skin. They are rather cheap and easy to get/ You should always use cotton powder puffs on sensitive skin. Therefore, if your client fills out their consultation card that they have sensitive skin, this is a must. It is made with cotton fibers and holds the powder well.
Compact Powder Puff
A compact powder puff is great for both loose powders and pressed powders. It will leave a more matte finish and gives you better control during application. It makes it easier to apply an even coverage and ensures the makeup lasts longer.
Contouring Sponge
These sponges are great for highlighting and contouring by reaching the areas that are hard to reach. They usually come in an egg or tear shape. They can be used with bronzer and highlighters and both cream and liquid products. It will make the color of bronzer softer.
Satin Cotton Puff
These satin cotton puffs are small and give an application that is flawless. One side has a satin fabric and the other side has a puff. They are used as a replacement puff. They are inexpensive and they fit in all compacts.
Cosmetic Sponge
These come in a rectangular shape or a circular shape. They work well with powders and liquid foundations. They work with wet and dry applications. A cosmetic sponge is effective at preventing the foundatoin from looking caked on.
Cosmetic Wedges
These sponges do not absorb the product. The sponge is triangular so you can reach crevices and hard to reach areas. It works with liquid foundation or illuminator. Plus, you can use with concealers used to cover dark circles. They make it easier to apply the perfect amount of makeup because they only absorb a little of it. This ensures less waste of the product as well.
5.9 Eyelash Curler
Clean the rubber on the eyelash curler after using and this tool will last decades. You can use a cotton swab or square gauze and some alcohol to clean that little rubber piece to kill bacteria. You should curl the eyelashes before you apply mascara or you risk damaging the eyelashes or causing them to fall out. You can also get a corner eyelash curler that allows you to curl smaller sections for precision.
- There are times when the regular eyelash curlers will not be able to get all of the lash in the area. A corner eyelash curler solves this issue.
5.10 Tongue Suppressors
Stick a couple of these in your makeup bag to remove the rest of the product from the bottom of a jar so that you don't waste any. You can also use spatulas. They can be great for mixing as well. You can also use lolly sticks for smaller bottles.
5.11 Makeup Bag Tool Checklist
5.12 Useful Tips
- Always have a spare brush, sponge, eyelash curler or toungue suppressor, as you never know when you may accidentally leave on behind.
- Ensure that you use disposable products wherever
5.13 Personal Hygiene
MODULE SUMMARY
Module 8 : Corrective Makeup Techniques
Corrective Makeup Techniques
Most notes are from website itself, I added some personal
- Round and Square faces: use a darker foundation along the outer edges of the temples and blend it. Then blend the same foundation along the jawline and cheekbones. A lighter foundation should then be used in the centre from the chin to the forehead.
- Round eyes: extend the shadow past the outer corners of the eyes to lengthen them and make them look more oblong. This technique will also make the eyes look bigger. Eyeliner can also be used to obtain the same effect. You will apply the eyeliner along the top eyelash from the middle of the eye to the outer corner. Pass the line of the eye slightly. Now apply the liner to the lower lash line from the middle to the outer edge to meet the other line. Now fill in that triangle shape in between the lines. It will create a longer eye and, in essence, make it look bigger.
- Close-set eyes: by applying lighter colored eye shadow on the lids of the eyes near the nose, and darker colored eye shadow near the edges of the lids, it will make the eyes look further apart.
- Deep-set eyes: light and reflective colors can be applied into the creases, and darker colors should only be used sparingly.
- Prominent eyes: make it harder to notice the eyes by blending a medium shadow over the prominent part of the eyelid and then blending it up towards the eyebrow.
- Round and Square faces: use a darker foundation along the outer edges of the temples and blend it. Then blend the same foundation along the jawline and cheekbones. A lighter foundation should then be used in the centre from the chin to the forehead.
- Narrow face: a light foundation used along the outer edges of the cheekbones can be used.
- Wide jaw: use a darker colored foundation under the cheekbones and on the jawline.
- Receding chin: highlight the chin with a lighter colored foundation.
- Double chin: Apply a darker foundation to the double chin under the jawline.
The technique of applying corrective makeup uses dark and light colors and shades to contour and highlight facial features.
It is about creating the illusion that the face is in a better balance or proportion. It is a technique that is used to make that symmetrical look that is seen as beautiful. It can give the eyebrows a more equal look or make the lips fuller.
Corrective makeup techniques camouflage imperfections, so that they are less noticeable. It can be used for scars areas that are darker and any other features that people like to hide.
8.2 TIPS FOR APPLYING CORRECTIVE MAKEUP:
- The idea is to eliminate imperfections and if you do it correctly it can make anyone look perfect.
- Tips to keep in mind.
- Highlighting emphasizes a feature
- shadowing makes features less noticeable and minimizes the feature
- blending is necessary to make the makeup seamless.
8.3 TOOLS:
- dark, medium and light colored lip liner
- Various shades and colors of foundations
- Dark and light shades of concealers
- Eye shadows and eye lining pencils
- Light to dark colors, including grays and browns
- Translucent powder
- Brushes, sponges and applicators
- Angled tip tweezers
- Various brushes of different sizes.
8.4 HOW TO USE PRODUCTS
- CONCEALER: Should match the skin color exactly or as close as possible. This provides good coverage and can be used for a number of imperfections from dark circles to yellow tints to hiding unwelcome blemishes.
- EYE BRIGHTENER: Have become an essential product found in all makeup artist bag. They help to lighten and widen the eyes. Eye brighteners work well on tired eyes, making them perky and alive.
- FOUNDATION: is an essential product that should be a perfect match to the natural skin tone. This will help you create that perfect finish, highlighting features and hiding imperfections.
- PRIMER: The primer should be seen as your canvas. It is applied first to help smooth the appearance of the makeup and increase how long it lasts.
8.5 PERFORMING THE TECHNIQUES
- These techniques will help correct various imperfections and make them look better.
- ROUND EYES:
- Extend the shadow past the outer corners of the eyes to lengthen them and make them look more oblong.
- This technique will also make the eyes look bigger.
- Eyeliner can also be used to obtain the same effect.
- You will apply the eyeliner along the top eyelash from the middle of the eye to the outer corner. Pass the line of the eye slightly. Now apply the liner to the lower lash line from the middle to the outer edge to meet the other line. Now fill in that triangle shape in between the lines. it will create a longer eye and, in essence, make it look bigger.
- Extend the shadow past the outer corners of the eyes to lengthen them and make them look more oblong.
- CLOSE-SET EYES:
- by applying lighter colored eye shadow on the lids of the eyes near the nose, and darker colored eye shadow near the edges of the lids, it will make the eyes look further apart.
- DEEP-SET EYES:
- Light and reflective colors can be applied into the creases, and darker colors should only be used sparingly.
- PROMINENT EYES:
- Make it harder to notice the eyes by blending a medium shadow over the prominent part of the eyelid and then blending it up towards the eyebrow.
- ROUND AND SQUARE FACES:
- use darker foundation along the outer edges of the temples and blend it.
- Blend the same foundation along the jawline and cheekbones.
- A lighter foundation should then be used in the center from the chin to the forehead.
- NARROW FACE:
- A light foundation used along the outer edges of the cheekbones can be used.
- WIDE JAW:
- Use a darker colored foundation under the cheekbbones and on the jawline.
- RECEDING CHIN:
- Highlight the chin a lighter colored foundation.
- DOUBLE CHIN:
- Apply a darker foundation to the double chin under the jawline.
8.6 USING CORRECTIVE TECHNIQUES FOR BROWS
- When the eyebrows have high arches, it can make your face look narrower.
- Creating high brows can be a perfect technique for people with a round face.
- If the face is already narrow, it is not a good idea to have highly arched brows. It will elongate the face even more.
- You can remove the extra hair on the top of the arch and fill in underneath the arch.
- This technique will also make a low forehead look bigger.
- For your clients whose eyes appear further apart, you can make the distance between the brows wider and then extend the brow out more a bit.
8.7 CORRECTIVE LIPS TECHNIQUES
- THINNER UPPER LIP:
- Line the upper lip with a lip liner.
- Make sure that you stay on the outermost section of the lip without extending too far.
- Fill in with lip color.
- Line the upper lip with a lip liner.
- THINNER BOTTOM LIP:
- Line the lower lip with a lip liner.
- Make sure that you stay on the outermost section of the lip and don't extend too far.
- Fill in with the lip color.
- Line the lower lip with a lip liner.
- THIN LIPS:
- Line both of the lower and upper lips with a lip liner.
- Be sure to stay on the outer section and don't extend too far.
- Fill in with a lip color that is light and not glossy or frosty.
- Line both of the lower and upper lips with a lip liner.
8.8 CORRECTIVE TECHNIQUES FOR THE NOSE:
- TOO LONG:
- To shorten the nose, you will apply a dark shadow underneath the nose and over the tip of the nose.
- Be sure to blend it very well
- TOO SHORT:
- Apply a highlighter right under the nose and on the tip of the nose
- TOO NARROW:
- Apply a highlighter to either side of the nose and thoroughly blend
- TOO WIDE:
- Apply a shadow on both sides of the nose and then a highlighter down the center going from top to bottom.
8.9 CORRECTIVE TECHNIQUES BASED ON FACE SHAPE:
- The face shapes from round to square and narrow to diamond, oblong, heart and more.
- There are corrective techniques you can do to reduce their facia features that they are not happy with.
- If your client has a round or square face:
- Use a darker foundation along the outer edges of their temple, along the cheekbone and the jawline.
- Use a lighter foundation down the center of the face all the way from the forehead to the chin.
- In the event your cllient has a narrow face:
- Using a lighter foundation along the outer edges of the cheekbone.
- Some of your clients may come to you to hide their double chin.
- Using darker foundation under the jaw and over the double chin
- When dealing with a wide jaw:
- Use a darker foundation under the cheekbones and on the jawline
- Makeup can really be used to fix many of the imperfections and make anyone look great.
- TRY NOT TO LET YOUR CLIENT SEE THEIR FACE UNTIL IT IS ALL DONE BECAUSE THEN IT WILL REALLY ACCENTUATE THE CHANGES THAT YOU MADE.
- Ask them if there is anything they don't like about their appearance
- With this info you can apply these techniques and explain to them (or not)
8.10 COMMON CORRECTIVE MAKEUP MISTAKES
- 11 most commos mistakes that can happen when doing corrective makeup:
- 1. Eyebrows look unnatural
- often because you have used too much color to correct them in the first place.
- 2. The eyebrows are too arched or too thin immediately making them look unnatural
- 3.False eyelashes not placed correctly or wrong ones used, making them look fake.
- Remember, even with false eyelashes you want them to look as natural as possible
- 4. Using too much mascara to try and correct the eyes
- result in unwelcome and clumped lashes
- 5. Eye shadow which is too heavy and not blended properly.
- Will look unnatural and can have a negative impact on your final product
- 6. Not blending in the shading, making it look complety unnatural
- 7. Using too much cheek color or putting it in the wrong place so that it doesnt highlight the cheeks properly
- 8. Using too much lipstick when trying to correct the lips
- 9. Using the wrong color foundation.
- The foundation should be as close a match to the natural skin tone as possible, be well blended into the neck line.
- Remember, the neck is a lighter shade, so using the wrong color on the face will show up in photographs, on film or even under heavy lights
- 10. When you have finished, the face appears shiny
- 11. Highlighling the wrong or puffy areas of the face, therefore, not hiding them, but rather making them stand out and be noticed.
- 1. Eyebrows look unnatural
8.11 MAKEUP ARTIST ART
- This art on this canvas works as an illusion - you're making eyes appear closer together, nose is thinner, face is a different shape, etc.
- What tools do I use?
- Apply the makeup just like you apply regular makeup.
- The only difference is in the colors that you choose. T
- There are sets of contouring brushes available that you can use as well.
- Make sure that you apply the makeup the same way though.
- Apply the makeup just like you apply regular makeup.
- Blending
- If you don't blend it, the look is not natural-looking.
- By blending, you are making it look convincingly natural.
- The rule of thumb with corrective makeup techniques is to blend, blend and then blend again. The finished product should be smooth and seamless.
- Dark foundation should blend into lighter foundation without it looking streaky.
- If you don't blend it, the look is not natural-looking.
Module 1: What is Beauty and Makeup Artistry?
What is Beauty and Makeup Artistry?
1.1 Introduction
- Makeup Aristry - the way makeup is applied to the face
- Accentuates a person's best features
- Reasons why people wear makeup:
- To look younger
- To have clear looking skin
- The study of beauty & makeup -> Teaches techniques that will help create certain looks
- Makeup can hide imperfections + highlight best features
- Not just physically, but psychologically too
- Hide unwanted blemishes, refine features, boost self esteem
1.2 Psychology of Makeup
Why do people wear makeup?
- Perception of those around us makes makeup application part of our routine
- Researchers think we have detectors of beauty
- Meaning we naturally seek out appealing faces
- Studied & Attractiveness
- Symmetrical face, youthful > older
- Makeup shows an absence of male hormones by enhancing female features
- Until men & women hit puberty, faces are similar
*Mascara, eyeliners and eyeshadows enhance eyes & make them look bigger
*Blush accentuates cheekbones, makes them look higher & pronounced
*Lipstick enhances plump and makes them more defined
*Foundation & concealer give smooth skin and emulate (match) youth
- Someone with little knowledge can still pull it off and enhance their attributes slightly
- An artist can accentuate EVERY attribute if done correctly
- Makeup changes the perception of the onlooker
Red Lipstick
- Sign of prowess (bravery), assertiveness (confidence) and authority
"Men will spend 7.3 seconds more looking at a woman's lips when they are wearing red lipstick."
Bright Eyes
- Perception that the eyes are bigger
- "'Bambi-eyes'" - makes whites look brighter and opens up the eyes
- During the Day:
- Focus - hide imperfections while still looking natural
- During the night:
- Focus - Accentuate features
Lucious Lashes
- History
- In Roman times, full and luscious curled lashes was a sign of:
- Enhancement
- Desire
- Purity
- Thought that eyelashes of a woman would fall out after many sexual encounters - women needed to have lush lashes to prove their purity
- In Roman times, full and luscious curled lashes was a sign of:
- Full lashes accentuates the eyes and make them look bigger
- Mascara
- Lengthens
- Separates
- Adds volume
- Draws attention to eyes - makes look longer and thicker
- When used with eyeliner and eye shadow, gives a polished look
Smooth Skin and Flush Cheeks
- Skin that glows and cheeks that are rosy portray health and youth
- Rosy cheeks - sense of:
- innocence
- Beauty
- Sensuality
- If not used overboard, it will enhance look
- Accentuates cheekbones and makes them look higher
- Pulls focus to the eyes and gives person a youthful more feminine look
Foundation and Concealer
- Cover up imperfections
- Give skin youthful look
- Makes face look clear and blemish free
- They:
- Hide imperfections
- Fill in fine lines and some wrinkes
- Present clean and glowing skin
- Concealer
- Covers areas you find imperfect
- Covers lines around lips and eyes
- covers blemishes
- Gives the look of smooth, youthful skin
- Foundation is applied next because concealer can't do all the work alone
- Even toned skin
- Get as close to your skin color as possible
- Color may be different at different times of the year
- Be able to blend into the neck
Over all purpose - to look natural; do not cake it on
Don't get a shade that is much darker or lighter than your natural color.
1.3 Makeup artistry
Makeup artistry is elaborate designs as well as natural.
"Beauty is often perceived as one of the most pleasant aspects of life."
Cosmetics has become a mark of womanhood and maturity.
- Older women tend to wear it to capture her youth
- Younger women tend to wear it to give her confidence
Much health and mood comes from the perception we give of ourselves.
- Makeup gives up confidence that makes us feel great
- Older women tend to wear it to hide fine lines and wrinkes
- Younger women try to look older, sophisticated and elegant
Use of makeup can improve overall health and well-being, and some products can protect the skin.
- Products can protect skin against sun's harmful rays - reduces risk of skin cancer
Makeup enhances facial features
1.4 Modern Makeup Artistry Trends
- Winged Mascara
- Accentuates eyes, making them appear bigger and noticeable
- Dark Lipsticks
- Dark berry colors, rich reds & oranges
- Ensures lips are noticed
- Chocolate Eye shades
- Have versatility (ability to adapt)
- Popular with all skin tones and eye colors
- Pop Art
- Uses bright blues, red, and greens
- Smokey eyes
- Eyes pop and noticeable
- Sun kissed skin
- healthier complexion
- Helps women feel better about themselves
- The natural look is very popular with bare makeup that can barely be seen. Natural lips and eyes combined with a concealer and foundation to hide imperfections provides that relaxed and casual finish.
- Modern makeup artistry trends include bold and bright colors; it's daring and makes a statement.
Modern makeup include bold and bright colors - daring and makes a statement
Module 2 : History of Makeup
2.1-Cosmetics in ancient times
for centuries ,various forms of cosmetics have been used to enhance beauty ,promote better health , and used in religious rituals. rthe use of these products in the past may have been for more practical means, such as protecting the skin from the sun, to hide beauty imperfections and to establish class status. in ancient rome makeup was used for ritual purposes and by women of wealth. it was also used by prostitudes though to expensive for the poorer women at first, until cheaper options became available at the trading posts.in ancient times, the makeup would be applied in a private room, away from the eyes of men
women had helpers who would assist in applying their makeu. unfortunately the makeup back then had a very bad smell ,forcing women
Module 3 : Role of a Beauty Makeup Artist
A makeup artist will listen to the needs of their clients and then work to create a look that enhances their natural beauty, works well with their best features, and creates the look they want.
The more you know, the better off you will be.
Color and Skin Tone
Not everyone will look good in all colors and you will need to know how to effectively determine which colors work and which ones to stay away from. That means that you will need to know enough to be able to apply the makeup for the client's individual skin maturities, skin types, and face shapes.
It is important that you are constantly updating your knowledge of the industry, staying updated with the latest makeup trends and know what new products have just entered and are about to enter the market. You can only achieve this if you have a passion for makeup and want to constantly learn and update your knowledge base to provide your clients with the best possible service and support at all times.
3.3 Average Salary
lipsBecause a makeup artist performs in such a wide spectrum of places, it is difficult to narrow down a salary range. A freelance beauty makeup artist can get paid per project or per the hour. It is hard to say how much you can make because it is all about how many jobs you book, what you charge, and how far you push yourself.
If you work in a salaried position in a busy city center, you can expect to make approximately $64,000 per year or $30 per hour.
However, if you get yourself into television and film, you can make upwards of $88,000 per year. Makeup artists that work on celebrities, fashion shows, and for large cosmetic brands can make about $3,000 per day; a similar amount of money to a Financial Manager with years and years of education and multiple degrees. It can be a very lucrative career choice. When working on a freelance basis, you have the ability to negotiate. Pay is often determined by experience, ability, and industry. A film company is likely to pay slightly less than a large fashion show; whereas a salon will provide a regular and stable income.
3.4 Sample Career Path
pathHere is an idea of the career path that you may take in this industry. It will be important to realize where you want to be and set goals for yourself and your business. Get serious about your career and work hard to create a plan that gets you where you want to be in as little as five to ten years depending on your career aspirations.
First and Second Year
Get yourself a mentor. Work as an assistant makeup artist and utilize your mentor's knowledge to learn more skills and perfect your trade. You will have access to their product lines, techniques, and clients. Therefore, you can start to learn what to do, how to book appointments, and take some side jobs to start making it happen for yourself. There are a number of positions within the industry offering internships. This is an opportunity to gain practical knowledge while studying, which can help you with your theory. Be prepared to start at the bottom and work your way through the ranks; you can't expect to walk into a salon and be hired as one of their top makeup artists before you prove yourself.
Third through Fifth Year
Start to branch off on your own and build your own clientele, reputation, and business. You will have the experience, a portfolio, and know how to deal with clients. You can still work with your mentor, but the focus needs to turn to developing your own name in the industry. Building up a reputation in the industry takes time and patience. You should set yourself targets on how many clients you want to see each week, ensuring that they return to you when looking for makeup services again in the future. This will help you to build a solid customer base of clients who know that they can rely on you and trust your services. When you do open your own salon, they will follow.
Sixth through Eighth Year
Your client list has likely expanded and now it is time to start mentoring your own assistants. It can be hard to keep up with all of the work that you have. You have the experience to train and instill your brand into your assistants. This is the point in your career that you are well known, at least in your area, and that you are ready to take on more responsibilities, including training and developing your own staff. Ensure you feel confident in taking this next step. This is a step you have been working to and should have it all mapped out on where you want to take your business, how you see yourself growing the business and your targets that you must achieve moving forward.
Nine Plus Years
Work to get yourself in with a cosmetics brand or begin implementing new services. Open up a salon and offer various services besides just makeup. Become a consultant and help people find their perfect look. Incorporate all of your training and know-how into your business. You are a master of your skill now and you should be able to continue to grow your brand and increase your business. It is at this point you can start working with companies in a host of industries providing your service. You can provide everything from wedding makeup to stage makeup, and makeup for television and films.
3.5 Working Conditions
conditionsThe conditions that you work in are forever changing in this business. You may set up a booth in a salon, go to a hotel room of your client, go to their home, be on the set, or in a million different places. You may be working out of a makeup bag, the trunk of your car, or in a salon. You may have to fly to a remote location or stay local. The idea is that you go where your client needs you to go. Make sure that you network wherever you go. The idea of building better relationships and meeting new people should always remind you of how you will work to build your brand.
Never limit yourself by not being prepared to perform your services outside your salon or home.
You want to make sure that you have a travel case or bag for your supplies. Be sure to bring all of the things that you need to maintain your materials as well. You never know when you may have to stay overnight because the shoot went on too long. Pack for a longer trip every time. You may feel like you are living out of your suitcase or vehicle at times. There are just too many factors to consider when working in this industry. You will likely not be working regular business hours. Therefore, be prepared to get your errands done in between jobs or on your lunch break, if you have a lunch break. You will want to fill your day with appointments and not leave much time for anything else. These opportunities will arise and you just have to play it by ear. That means to always be prepared. Leave your dry cleaning in the car, so if a client cancels, you can drop it off. Keep a cooler with lunch in it so you can eat on the way to your next appointment. Bring a book to read or a magazine for when your client is late or you get done a few minutes early.
3.6 Entertainment Industry Careers
filmsOne of the main fields that makeup artists find themselves in is the entertainment industry. This can include movies, theater, reality shows, television sitcoms, and concerts. They apply makeup to the actors or performers before an event. They can work individually or as part of a team. In this capacity, you may work with the stylist to make sure that the colors that you use work with the wardrobe. You may have to switch looks quickly to get them ready for a new scene or song. You may need to read the script and sketch out a few designs to appease the director. They have a vision for their stars and it is your job to fulfill it. Maybe the scene takes place in a different time period and you will have to research how they wore their makeup back then. You really have to know the character, time period, wardrobe, and create a look that is perfect for that particular job. This can be a bit more challenging than a simple makeover or a daily application for a reality star. However, there will be a need for that as well. If they have a big event, you may need to style them differently. They are leaving you in charge of finalizing the look. And you will have to work hard to capture their vision.
Be ready for some irregular hours in this industry.
You will work long hours for several months straight if you are making a movie. You may have several months without work as well. You may need to relocate for a certain period of time if they are shooting in a different location as well. These are the things that you should be aware of. If you land a job in a television studio, you can expect to work long hours. It is normal for those working in this capacity to work over forty hours a week. They can apply light makeup to news broadcasters or special effects makeup.
It is completely normal for the makeup artist to stay throughout the filming process to touch up the makeup or change it for various scenes.
They may also stay until the end to properly remove the makeup so that the clients are not wearing mascara overnight and drying out their eyelashes to the point that they fall out. The good news with working in the entertainment industry is depending on which sector you are working in, the pay can be good. Even if you own your own salon, you may want to offer your services to the entertainment industry, helping them when they are short of makeup artists, to build and grow your business moving forward.
FACT
apes When adjusted for inflation, the movie Planet of the Apes holds the world record for the highest makeup budget (then $371,604), which represented about 17% of the total budget ($2.2 million). Source: imdb.com
3.7 Fashion Industry Careers
fashionMakeup artists also work in the fashion industry preparing models for runway shows, photo shoots, and advertisements. They may even be employed in this industry to maintain the image of a model with regular applications of a certain makeup brand. For example, if a model is a spokesperson, the makeup artist may be asked to do their makeup every day so that if they are seen, the image is still upheld. Teamwork and independent work are available in this industry section. The idea is to sell the makeup, clothing, and accessories. Therefore, it will be important for you to make sure that you show an eye for every detail. It will be important to understand what the lighting does to the makeup and apply it accordingly. This is super important. If you work for a magazine, you may use computer programs or airbrushing to touch up photographs, which is something you will rarely see in other sectors of this industry. To work in the fashion industry you need to be very confident about your makeup knowledge and skills. You will work with the clothing designer before the show to come up with makeup ideas that complement their wardrobes. You may work on photo shoots and the makeup ideas you choose need to really stand out and make a statement in front of the camera.
3.8 Service Industry Careers
storeMany makeup artists work in a cosmetic service industry full time. They go to cosmetic events and sell the makeup to clients in department stores. They answer questions about the products, give makeovers, and demonstrate various techniques. Other service industries include spas and salons. In these service jobs, a makeup artist would give facials, makeovers, consultations, and build a client list. They make recommendations to their clients and apply their makeup for special events, like a wedding. The same skills will need to be learned for a career in this capacity. It is likely where most makeup artists start while they build their clientele, experience, and portfolio. You will need a degree or certificate to work in a salon or spa. These makeup artists are also called aestheticians if they are licensed. These are the things that you should strive for. You want to become certified and licensed, so that you can work anywhere in the industry.
3.9 Freelance Work
freelanceIf you decide to work on your own and not for a company, you can be a freelance makeup artist.
It will be very important to make sure that you are networking and marketing your skills.
A website is great for freelance work. You would want to make sure that you display your portfolio and have business cards.
It will be essential for you to build a strong portfolio if you are going to work as a freelance makeup artist.
You will need to concentrate on marketing your services. Attend fashion and cosmetic events to gain contacts in the industry and get your name out there. You will need to gain the trust of your clients and continue to work with them. It may take a few years until you can successfully rely on freelancing alone. Then you can start to build your business further to the point where you employ other people.
A great way to break into the industry as a freelancer is to promote services for people preparing for weddings, award ceremonies, beauty pageants, and parties.
These special occasions are when a lot of people are actively looking for the services that you provide. You can start there and then grow your business through referrals and networking. In this capacity, it is very likely that you will be traveling to people's homes and doing the work there. You will be required to have a traveling kit and be able to meet clients at their event, or at a hotel, or in their home. Do your best to make sure that they are happy; they will ask you to help them with events in the future or refer their friends to you.
The benefit of working freelance is that you can chop and change from one job to the next within a few days or hours.
One day you will be doing makeup for a local wedding and the next you will be whisked half way across the world to do the makeup on a film shoot for a few months. This provides you with versatility and an opportunity to put all the skills and knowledge you have learned over the years to the ultimate test.
Module Summary
In this module, you gained an idea of what a beauty makeup artist does in several different industries. It gave you an idea of which industry you may want to get involved in. You learned about the benefits of each industry, got some indication on average salaries across the board and a timeline on how to open your own salon, if this is the step you want to take moving forward.
File Edit Insert View Format Table
If you work in a salaried position in a busy city center, you can expect to make approximately $64,000 per year or $30 per hour.
Be ready for some irregular hours in this industry.
It is completely normal for the makeup artist to stay throughout the filming process to touch up the makeup or change it for various scenes.
It is completely normal for the makeup artist to stay throughout the filming process to touch up the makeup or change it for various scenes.
Makeup artists also work in the fashion industry preparing models for runway shows, photo shoots, and advertisements.
Many makeup artists work in a cosmetic service industry full time.
If you decide to work on your own and not for a company, you can be a freelance makeup artist.
It will be very important to make sure that you are networking
and marketing your skills.
It will be essential for you to build a strong portfolio if you are going to work as a freelance makeup artist.
A great way to break into the industry as a freelancer is to promote services for people preparing for weddings, award ceremonies, beauty pageants, and parties.
The benefit of working freelance is that you can chop and change from one job to the next within a few days or hours.
Module 6 : Working with Makeup Artist Brushes
- Apply the foundation down the center of the face and then blend it outwards towards the hair line. It will keep from forming makeup lines. Downward broad strokes should be used to apply the foundation on the forehead, nose, cheeks, and chin.
- Dot the concesler onto the outer part of the eye. Use the brush to pull it into the inside of the nose and then back out again. Now dot the concealer again and put it in the inside corner of your top lid. Dot the concealer again and swipe it under the eye. Go from the outside of your eye under the dark circle area and then inside and back to the outside. This will reduce the look of tiredness.
- Use a medium or dark brown eye shadow for brunettes. Taupe look great for red hair or blonde hair. Charcoal or silver are good for grey hair.
Module 7 : Skin Tone: Foundation Selection and Application
So light foundation is used for day time and th cream foundation is use for night out the town medium coverage . Cream foundation is for touch up and stick handy application but A-High pigment base gives most coverage but is heavy for use everyday
*apply concealer first before applying tinted foundation.
A great tool to have is a light-reflecting pencil. It works well for the under-eye dark circles. It adds light to the area under the eye and lifts the area up a bit.
It can be applied right on top of a tinted moisturizer or foundation. Be sure to blend it in well. You can use your smaller blending brush to make sure that it blends in properly. Use twirling motions until the harsh lines are buffed away. A cotton bud can also be used to blend it effectively. A light powder can be applied to the face to make sure that it isn't too oily or shiny.
Foundation for oily skin non-clogging and for sensitive skin foundation be careful use mineral based foundation. Creamy moisturizing foundation dry skin will benefit from creamy moisturizing foundation hydrate skin
there are many people who just have redder skin and these green primers create an even tone to start off with. If the client experiences discoloration on their face, an apricot colored primer is key. If your client is experiencing dull or lifeless skin, a lavender primer can be used to brighten it up.
- Clean the area before starting the process.
- Apply a moisturizer, sunblock, and primer.
- Pour a drop of foundation into your palm and use the triangle sponge or brush and touch it to the foundation.
- Spread the foundation all over the face. Try to spread it evenly.
- Blend it in well.
- Fade it into your neck by applying a layer to your jawline and pulling it down.
Once you have followed these steps, it may be time to add a concealer. It is important to make sure that you cover any blemishes or dark circles around the eyes. Concealer will be used to lighten the dark circles, or you can use a light-reflecting pencil. Make sure to just use your fingertip to apply the concealer to the top of the blemish. If you apply too much, it can make the blemish easier to see. Blend the concealer in well. Use some loose powder to complete the base.
It is very easy to make basic mistakes when it comes to applying foundation. Applying in a hurry, not taking careful note of what you are doing, or choosing the wrong color can all have a very negative effect.
It is very easy to make basic mistakes when it comes to applying foundation. Applying in a hurry, not taking careful note of what you are doing, or choosing the wrong color can all have a very negative effect.
- Applying too much foundation is one of the biggest mistakes you can make. Remember, you want a smooth and seamless complexion; applying too much is just going to leave a very flaky appearance which is going to look fake.
- It is very easy to make a mistake and use the wrong foundation based on your client's skin tone. It is essential that the foundation you use works with the client's skin tone. Foundations for oily skin should have non pore-clogging properties; when applying to sensitive skin, you should always use mineral-based foundations; dry skin will benefit from a creamy moisturizing foundation that will hydrate the skin.
- Using the wrong color can have disastrous effects, especially under bright lights or on film. It is imperative that the face and neck are the same color. If they don't match, it will be easily noticed by everyone in a photograph or if the person is speaking on stage under heavy lights. This will also be picked up on camera during filming.
- Applying foundation with your fingers. In addition to this being completely unhygienic, you will only find a streaky outcome if you use your fingers rather than a sponge or brush when applying foundation.
- You don't blend the foundation down the neck. Remember, the neck is always slightly lighter in color than the face, you want the color to blend evenly from the face into the neck.
- One of the biggest mistakes you can make when applying foundation in a hurry is not waiting for the moisturizer to dry. You need to wait those few minutes and be patient, ensuring the moisturizer is completely dry before applying the foundation for the best end result.
The primer will fill in those tiny lines and create a smooth surface. It also makes the pores disappear, creates a matte look, and creates silky-looking skin. Many makeup therapists use this on their clients that are over thirty because it creates a much younger-looking face.
A good primer will also offer a host of benefits that you need to be aware of, in addition to helping makeup stay on for longer.
 A great tool to have is a light-reflecting pencil. It works well for the under-eye dark circles. It adds light to the area under the eye and lifts the area up a bit.
It can be applied right on top of a tinted moisturizer or foundation. Be sure to blend it in well. You can use your smaller blending brush to make sure that it blends in properly. Use twirling motions until the harsh lines are buffed away. A cotton bud can also be used to blend it effectively. A light powder can be applied to the face to make sure that it isn't too oily or shiny.
Module 9 : Beauty Makeup Styles
Dewy Look-
Start with moisturizer then apply tinted moisturizer using a foundation brush then powder eyelids. light pink shimmer eyeshadow, mascara to upper lash only. pink shiny lip gloss + blush
Module 10 : Eye Makeup
Eye Makeup
Most are their notes, some are personally added
10.1 Introduction
One of the most significant parts of any look is the eye makeup.
- Eye makeup is essential for women who are looking to accentuate their eyes.
- With the right application:
- Can give eyes dimension and depth
- Can make them more noticeable and attractive.
1. Start by applying a concealer
Apply to the area underneath the eye.
- This is where the skin is thinner and therefore, it usually has a bluish tint to it.
- You may want to also apply a line of concealer just underneath here so that you don't get the raccoon eye look.
You can get rid of the circles under the eyes by applying three dots.
- The first dot should be at the inner corner where the skin is usually the darkest.
- Then pat the concealer into the skin until it is blended in and disappears.
2. Apply the eye shadow primer
Will keep the shadow in place for hours.
Perfect for keeping the eye shadow in place through exercise, weather conditions, and even over many hours.
3. Apply the eyeliner
Apply the eyeliner in general terms:
- Use an eye pencil or a liquid liner to line the eyelid as close to the upper lash as possible.
- Start at the inner corner of the eye and move towards the outer corner.
- You may want to place your finger gently in the corner of the eye to tighten up the skin a bit.
- This way you won't get sections that are missing.
- Start at the middle of your lower eyelid and line from the middle of the eye out.
- Use a cotton bud to smudge the liner a bit. You don't want it to be a line like on the top.
- Be sure to get as close to the lower lash as possible.
Tip: For a smoky eye, pat an eye shadow that is dark below the lid and along the upper lid. You won't want a line, but rather a smudge.
4. Apply the eye shadow
To build the lids of the brow, use a three toned method. If you are developing your own colors, be sure to choose one that is light, a color in a medium shade, and a dark one.
Use the light color first.
- This one should almost match the skin color of your client.
- Be sure to cover the entire eyelid and up to the brow bone.
The medium color will follow
- Only be applied to the lid of the eye.
- Be sure not to go above the eyelid with the medium shade.
The crease will need to be colored with the darker color.
- Be sure to blend the colors together well by blotting them and not swiping the brush across the eye.
When applying eye shadow, you want to focus on the eye shape, ensuring that you apply the right color based on the eye color, and how you use your darker and lighter colors will determine the outcome of the eye shape in the end.
5. Highlight the inner part of the eye
In this step you will put a bit of the light-colored eye shadow in the inner corner.
- Will brighten the eyes and make them stand out more.
Press it into the inner section of each eye in the section where the eyelids meet.
6. Highlight the brow
Now dab the light-colored eye shadow again and dab it along the brow line from the middle of the brow outwards.
- Blend it a bit with the cotton bud or a small blending brush.
7. Use a curler to curl the eyelashes
Always do this before applying any mascara.
If you try to curl the lashes afterwards, you can dry them out and cause them to break off.
Use a blow dryer to heat up the eyelash curlers for a few seconds. Test on your wrist to make sure that it is not too hot. You don't want to burn the eyelashes. Then, curl the eyelashes holding it for three to five seconds.
8. Mascara
When applying the mascara, you will place the wand underneath the eyelash and move your hand slightly back and forth from left to right, right to left, and then again from left to right.
Now move the brush slightly up through the eyelash. Be sure to do this slowly and at the same speed.
- That will apply an even amount of mascara on the lash and will prevent it from clumping.
- Don't just swipe at the eyelash and pray that it spreads evenly.
10.2 Eye Shapes and How to Correct Them
Deep-set eyes
Deep-set eyes are large and provide a very prominent brow.
To reduce this and to bring the illusion that the eyes are more forward:
- Use beige or warm-colored eye shadow on the entire lid. Ensure you highlight under the arches.

Monolids
Very flat eyes with a flat surface or barely any surface.
- This is seen often with clients of Asian descent.
- This means that the brow is less defined and there is barely any crease in the upper lid to work with.
You want to create definition using a gradient eye shadow starting with dark and working your way to light.
- You will want the darker eye shadow to be closer to the lash line, going softer in the middle and then adding shiny eye shadow at the brow.
- It is imperative that you curl the eyelashes before applying the makeup to give definition.

Hooded Eyes
Extra-large eyes with skin that covers the crease of the eye.
- This makes the eyelid appear smaller than it actually is.
You can use a darker shade of eye shadow over and above the crease of the eye and then use a thick lash base to make the eye stand out and reduce the risk of it looking closed.

Protruding Eyes
A projected lid, they have the illusion that they are about to pop out of the skull.
- You want to focus on using dark tones when it comes to protruding eyes, basically pushing them back into the head.
Smoky eyes are the ideal makeup application for this type of eye. Always ensure when working with clients who have protruding eyes that you use thick liner.

Upturned Eyes
Almond shaped eyes that naturally lift in the outer corners. This makes the lower lid look considerably longer than the upper lid, which is something you can work with.
Focus on using darker eye shadows with clients with upturned eyes and use the dark shadow on the outer lower corners of the eye to give them the illusion of being shorter and thereby bringing the eyes into the correct position that you want to achieve.

Down-turned Eyes
Tend to drop in the outer corners.
Use a cat eye style that is perfect for this eye shape. Use liquid eyeliner on the top eyelid and extend it out and up at a forty five degree angle. This will help give the illusion that the outer edges of the eye have been lifted.

Close-set eyes
Give the illusion of more space
Best way to achieve this is to use light eye shadow in the inner corners of the eye. You will also want to use extra mascara on the outer edges of the eye, though be careful when applying that you don't apply too much which results in clumping.

Wide Eyes
Eyes are spaced too far apart.
Focus on the illusion of bringing them closer together.
Adding eyeliner to the top and bottom lids and bringing the eyeliner as close to the tear duct as you can.

10.3 Common Eye Makeup Mistakes
As a makeup artist, you need to know the most common mistakes made when it comes to eye makeup to ensure that you avoid them at all costs.
When looking for darker and bolder look - add few layers of mascara
Applying too much eyeshadow can leave you with heaby-looking eyelids
Do not use blush as eyeshadow.
Do not use liquid foundation as a base for your eyeshadow. If you don't have primer, don't use anything.
10.4 Eye Makeup Tools You Don't Want to be Caught Without
Here is a full list of essential tools you will need for eye makeup applications:
- Tweezers - Use these to shape the brow and remove stray hairs quickly and effectively.

- Brow pencil - Used to shape the eyebrows. If you don't feel confident, there are eyebrow stencils you can buy.
- Place the stencil over the eyebrow and fill in the center using the eyebrow pencil. Remove the stencil and tweeze any hairs outside the area. Fill in the lines with powder.

- Angled brow brush - helps you fill in the brow with eyebrow powder to create the desired effect.

- Brow styler - helps smooth the eyebrow hairs, keeping them in place and stopping them from standing up and having a mind of their own.

- Eyeliner brush - used to apply eyeliner to both the upper and lower eyelids. This brush is usually thin and pointed, very similar to a pencil.

- Shadow brush - used to apply eye shadow to the eyelid.

- Crease brush - used to shadow in the crease of the eye, this is usually a pointed brush.

- Smudge brush - a flat and small, tapered brush with stiff bristles, it is also sometimes a small sponge. used to smudge the eye shadow on the upper lid of the eye.

- Blending brush - large and tapered in design. Helps blend in the eye shadow with ease, reducing the risk of having set lines between shades and colors.

- Eyelash curler - Helps bend the eyelashes in an upwards style, which, once mascara is applied, gives them a longer and thicker look.

- Mascara - Used on the upper and lower eyelashes to darken, thicken, and lengthen.

- Eyelash comb - Used after the mascara is applied. It is highly effective in removing clumps, leaving the lashes looking natural and full.

Module 11 : Eyeliner Techniques
Eyeliner Techniques
11.1 Introduction
Used to:
- Create a statement
- Make eyes more beautiful
- Reshape
Gives ability to make perfect eye shape and finish.
Gives perception of being open, awake, noticeable, and make color stand out.
To brighten
Beige eyeliner on lower inner rim of eye - makes larger and distracts attention from red/tired eyes
Edgy or Bold
Colored eyeliner to lower lash line, from outer to inner edge using short strokes.
Tie together w/ shadow in same color family to shades brighter on top lid.
Add black to upper lash line and mascara
Smokey Eye
Line upper and lower lash line along all outer and inner rim.
Can use angled flat brush or cotton bud to smudge the lines for smokiness
Winged Tip
Use pointed/angles brush to apply from inner lash line to outer lash line
***You can draw wing with eyeshadow first since it's easier to wipe if you mess up. Then use cream liner to go overtop of it.
Elongation
For small eyes or eyes that sit close together.
Makes eyes look lonfer by putting focus on outer corner of the eye
Use cream liner
Line from outer third of lash line and connect to line above
Cat Eyes
Thick line of cream liner along upper lash line and bring out towards corner
short strokes - line from inner part of lower lash line to connect to top line.
Can make bottom thicker for more effect. But both lines can be same width.
Double Winged
Do the same for regular wing. For the second, start in outer eye parallel to the first wing and draw it back to the first line ABOVE - if placed below, it'll make the eyes droop.
11.2 Common Mistakes
- Applying too much on bottom lid - results in smaller looking eyes
- Apply too little then add as you go on
- Uneven application
- Don't pull lid in outer corner to get a straight line
- Pulling can cause wrinkles
- Client can point chin up or down for a better viewing angle
- Don't pull lid in outer corner to get a straight line
- Not using smudge proof liner
- Client expects it to last for hours
Don't only stick to dark colors when applying eyeliner. Only sticking to dark colors can leave the eyes looking tired and unexciting. Make use of white or nude eyeliner on the bottom lid to give the impression of wider eyes and a refreshed eye look.
11.3 Types and How to Use
Pencil
Easiest application
Keep a sharpener on hand
Easily managed and controlled, wide choice of colors

Gel
Use an angled brush
Steady hand
Glides easily, takes longer to dry
Ideal when achieving a smoky look

Liquid
Hardest to apply
Steady hand
use short strokes
Strt middle above lashes and slowly brush against lash line.
Ideal for cat eyes and dramatic looks.
Makes lashes look thicker.

11.4 Tips
Choose based on:
- color
- texture
- Application method
Smooth w/ fine lines - gel or liquid
Smudgy - pencil & finger
Apply liner after shadow is applied, but before mascara.
11.5 Tips, Tricks, and Hints
1. Make it last longer by putting shadow on top
2. Use pencil as a guide for liquid
3. Use white liner first to create even base for darker liner
4. Make own liner by wetting brush and using shadow
5. Monolids - use gel or liquid. Draw thich arch and fill in to open eyes
6. Add liner between lashes rather than across lash line - makes eyes more natural
7. If struggling, make dots in a line and then connect them
8. If you open eyeliner and is crumbly, place in freezer for 10 minutes - regains its shape
9. If unneeded smudges around the eyes, use skin colored liner to cover them up
10. When doing cat or wing, work from outer edge in
11. Use tape as a guide - bottom lashes to top end of the brow
There are three types of eyeliners available on the market, you should have each one in your bag at all times, giving you the ability to create different looks and styles, working with different shapes of eyes and more.
Eyeliner pencil
Eyeliner pencil is the most common eyeliner to use and also the easiest to apply. When in a hurry, you can draw the perfect line with the pencil within minutes. It is imperative to ensure that you keep a sharpener on hand, because as with any pencil, the eyeliner pencil is going to get blunt, which can make it harder to use. When using an eyeliner pencil, you should draw a line on the lash line. The good news is that this applicator can be easily managed and controlled, and there is a wide a choice of colors.
Eyeliner gel
Eyeliner gel is usually used by professionals and comes in a pot. You will need to use an angled brush to get the best application. It is imperative that you have a steady hand when working with eyeliner gel. The good news is that this option glides easily, though it does take longer to dry. Eyeliner gel is ideal when trying to achieve a smoky look.
Eyeliner liquid
Eyeliner liquid is probably the hardest to apply. It comes in a tube with a brush, similar to mascara. You will need a steady hand when applying eyeliner liquid. It is essential when using this applicator that you use short brush strokes. Start in the middle above the lashes and slowly brush along the lash line. Eyeliner liquid is ideal for creating cat's eyes and dramatic looks. It also helps make the eyelashes look thicker.
Module 14 : Cheek Color Application
Tip: If you are stuck, ask your client to clench their fist and hold it for ten seconds. The color of the skin once they open their hand is the one that you want to match. That will be the color to look for.
When applying blush, ask your client to suck in their cheeks so that you can see the apple of the cheeks well.
Module 20: Makeup for Seasons
20.2 Summer Sporty look
This is perfect for a woman on the go. They want to be cute and neat while they are active. This look takes only about five minutes to apply and is perfect for a day at the beach and even photo shoots on the beach. Start with a face and body sunscreen with a high SPF of around 30 that is oil free. It should include protection against UVA and UVB rays. The use of a water-resistant shimmer is perfect for the shoulders and the face to create that glossy look. The application of the shimmer on the face should only be on the forehead, cheeks, chin, and nose areas. That way it can deepen the look of the tan. Cream eye shadow can be used next in a natural color for the entire lid. This can be applied with an eye shadow brush. A water-resistant mascara can be used to create the depth in the eyes. There are several colors that work great for the summer with this look when it comes to mascara. You can try the traditional black or get funky with some turquoise, blue, or green. Make sure that the mascara is waterproof.
Those with oily skin will benefit from a foam cleanser followed by a lightweight and oil-free moisturizer. Due to the increase in humidity, those with oily skin are prone to clogged pores during this time of the year, so a facial mask may be the solution to unclog pores and make them look healthy again.
Change a lip color or just use lip gloss for that perfect finish. To really enhance the look get your client to wash their hair with beer for extra shine or with champagne to make their highlights really stand out during this season.
20.5 Choosing Makeup According to Your Clients' Season
Every person is associated with a season. Knowing your client's season can ensure you use the right makeup tones. Knowing their season can also help them identify what colors they should wear to improve their overall look.
Determine Cool or Warm
The first step is to determine whether your client is considered a warm or a cool. This is probably the hardest step of the process. The focus of this exercise is to identify their undertone, and this goes beyond skin tone. The undertone is what defines looks; it is determined by genes and it never changes. The easiest test is the foundation test. Dab a touch of pink foundation cream on one cheek and a dab of yellow foundation cream on the other. Blend both in evenly and then identify which one looks properly blended and which one appears to be painted on. If the pink is the one that appears to be blended, then your client is a cool, but if it is the yellow that looks blended, then they are a warm. The next is the gold and silver test. Take a piece of paper or fabric in gold, and in silver, and hold it over an area of skin that is not exposed to the sun, the best place is the inside of the wrist. If it looks as though the skin blends in with the silver, then your client is a cool, but if it looks as though the skin blends in with the gold, then they are a warm. The final cool or warm test is just as easy to accomplish and you don't need anything to do it. All you have to do is look at the veins on the inside of your client's wrist. Do the veins appear bluer or greener in color? If they appear green, then your client is a warm, but it they appear blue then they are a cool. Cool means that your client is a summer or a winter type while warm means that they are an autumn or a spring type. Which brings us to the next step of the identification process. You are now going to have to identify light versus dark to get a true understanding of what season your client is. If your client has dark eyes and hair and you have already identified that they are a cool, then they are considered a winter.
If your client has dark hair and eyes and you found that they were a warm undertone, then your client falls into autumn. They are a spring with light hair and eyes and a warm undertone. Now you can use this information to identify what is the best color palettes to use when it comes to makeup to ensure the best overall impression and outcome. If your client is a winter, then you are going to want to concentrate on pinks, blues and reds for their color palette. Don't use pastels - this will not enhance their look - and also avoid oranges, golds and beige when choosing the best colors to use. In the event your client is summer, then you can use pastel colors and neutral tones to enhance their makeup. Pastel blues and pinks combined with natural tones are ideal for anyone who falls into this season.
Module 21: Advanced Techniques
it when applying dramatic eye makeup. Once completed, gently remove the tape to enjoy the desired effect.
Tight lining is one of the techniques you will learn to help you provide your clients with color on their eyes while enjoying a natural finish. This is when you apply eyeliner between the lashes to add that little bit of color.
Curl lashes at the base and then again a little higher up. The second clamp ensures a double curl which is guaranteed to last longer.
Heat the lash curler with a hair dryer for a few seconds to provide the same effect as a curling iron. This will provide your client with beautiful lashes all day long.
21.9 Contouring
organicThe chances are at some stage your clients are going to ask you about contouring. It is an especially popular request with many celebrities employing this technique. Contouring is all about defining certain aspects of your face with the most important parts being your bone structure. That is why people will concentrate on areas such as the nose and cheeks although the chin and underneath the jaw line are other favorites that should not be ignored. The look is achieved by using contouring powder to accentuate different aspects although we will work through that in the steps that follow.
Step 1: What you need
Let's begin by checking out what you need in order to start contouring. Generally speaking, you are going to require an angled bronzing brush, a domed shadow brush and a denser fluffy powder brush. In addition, you will also need your contouring powder and ideally you should avoid those bronzers that have more than their fair hint of orange in their undertones as they can be difficult to blend. The entire idea here is to attempt to copy an actual shadow that is on your face to then make it seem as if you have more chiseled features. In order to achieve this, something that is more of a taupe/grey color would be best although the color should always be one or two shades lighter than your foundation.
Step 2: Your cheekbones
With this step we are looking at accentuating your cheekbones and in order to get this right you need to focus on the placement of the powder that you are using. To achieve this, you should begin by using your angled bronzing brush and pick up just a slight dusting of powder with you making sure that you tap off any excess in the brush. A lot of people then say that you should pucker your lips as this creates a better angle along your cheekbones and makes it easier to then brush along them. Gently go ahead and blend the powder into the contour that is created by you puckering your lips and always begin at your ear and then move inwards. Make sure that you go no further than the outer corner of your eye since this is required to make the shadow look that bit more believable. After this, use that fluffy brush and blend it in like crazy with you always doing it in an upwards fashion so it mixes in with your blush. Doing it the other way creates the wrong shadow.
Step 3: The forehead
Next we turn our attention to the forehead and this is especially important if you have a large forehead as contouring helps to effectively break up that space. To do this, use the angled brush in the powder once again and apply it along your hairline at the top of your forehead and also down the sides. Use the fluffy brush to remove any hard edges by working hard to blend it in more effectively and try to pull it downwards so it then covers to your temples as this helps to create a much better shadow.
Step 4: Your nose
Your nose is another important part of your face that works well with contouring, but only if you know how to do it correctly of course. The aim here is that you can make it look slimmer and straighter which is never a bad thing to be able to achieve. Use your domed eye shadow brush and with the contour powder blend along the sides of the bridge of your nose. You can then focus the powder on the middle of your nose although do be careful with how you blend upwards as no powder should appear on the bridge itself.
Step 5: Dealing with your eyes
Some people do like to do basic contouring with their eyes and the key is to find the top of your eyeball. Your contour powder should then be concentrated in the part above the space at the top of your eyeball in order to not only create a shadow but to also give you an instant eye lift.
Step 6: Your jawline
The final step we will mention is your jawline because if you do this contouring correctly you will find that you can suddenly develop the perfectly chiseled jaw that you have always wanted. With this, you need to use that angled brush once more and apply the powder underneath your jaw line in order to create that shadow effect. Never under any circumstance should you blend upwards because that will rather unfortunately make you appear to have some facial hair. Instead, go along the jawline rather than in any other direction and then with the fluffy brush you need to blend downwards to create that shadow effect. As you can see there is less to contouring than you were perhaps aware of, and as long as you are willing to take your time in trying to perfect your technique then it is certainly something that can completely alter the shape of your face in just a few minutes. Contouring requires just several brushes and powder two shades lighter than your foundation and if you follow the steps as set out above then you will create a believable look that seems to replicate the professionals.
21.10 Video Tutorial
Advanced Technique - Contouring – 13min 23sec
In this video Olivia will show you how to do contouring.
Go and Practise
Estimated time: 60 minutes Find some volunteers and practise contouring. Follow the instructions that Olivia gives in the tutorial video. Once completed come back and continue the course.
Module Summary
In this section, you learned how to pull it all together to create specific looks that are designed for various occasions. You also learned about using contouring to make the face appear more chiselled by defining the underlying bone structure.
Frequently Asked Questions
Worksheets
There is no worksheets for this course.
Module PDF's
Module 1: What is Beauty and Makeup Artistry?
Module 2 : History of Makeup
Module 3 : Role of a Beauty Makeup Artist
Module 4 : Skin Anatomy and Skin Care
Module 5 : Tools Used by a Makeup Artist
Module 6 : Working with Makeup Artist Brushes
Module 7 : Skin Tone: Foundation Selection and Application
Module 8 : Corrective Makeup Techniques
Module 9 : Beauty Makeup Styles
Module 10 : Eye Makeup
Module 11 : Eyeliner Techniques
Module 12 : Brow Grooming
Module 13 : False Lash Application Techniques
Module 14 : Cheek Color Application
Module 15 : Lip Color Application
Module 16 : Recent Beauty Trends
Module 17 : Makeup in TV, Film, and Magazines
Module 18 : Hair Styling for Makeup
Module 19: Maintaining Radiant Skin
Module 20: Makeup for Seasons
Module 21: Advanced Techniques
Module 22: Salon Management – Advertising Your Services and Your Business
Module 18 : Hair Styling for Makeup
MODULE 18 - MATCH HAIR DO WITH MAKEUP
18.1 Introduction
 When it comes to creating a look, it is important for the makeup to match the hairstyle. This is very important because if you don't plan the hair and makeup you can create a very confusing look. To be successful, you and the hairstylist need to work well together.
This way you can ensure that your make-up will complement the hair and vice versa. The following are some ideas of what hair styles will enhance your makeup styles.
Edgy
It will be a good idea to pair edgy hair styles with the cool tone makeup styles or the metallic makeup styles. These looks are designed to be edgy and to attract the attention to a single feature. If it is the mouth, a hair style that is edgy but may have hair that falls on the face is fine. However, if the focus is on the eyes, you don't want them to be covered up or overshadowed by the hair. Therefore, it is a good idea to make sure that the style is pushed away from the face. An edgy look can be out there and not tamed like other looks. For shorter hair, that can include spiky, wild hair. It is important to make sure that if your client's hair is edgy, the makeup is not soft or uses warm colors. Edgy styles are more suited to cold tone makeups, like greens, blues, and purples.
Sophisticated
When it comes to using a sophisticated hair style, it will pair nicely with warm tone makeup styles. The hair falling around the face looks nice with this style. However, a partial up and down do may be the perfect match. If the client has short hair, it may work better to keep it brushed down flat against the face. A high bun or ponytail also works great with the warm tone makeup styles. When the hair style has a softer and more sophisticated look to it, you will want to use soft colors, like deep reds, browns, and oranges. This will create a softer look for your client. To add a little edge to the sophisticated look, you can choose a pale face with little color and deep red lips.
Retro
If you are pulling in a retro makeup style, you want to match it with a retro hair do. It will be important to make sure the makeup style and the hair are in the same decade, so that it completes the look. If you are choosing a retro style, it should usually be paired with the makeup and hair of the time period. So, whether it's a bob or something else, make sure the hair and the makeup are working in the same era.
Power style
If you are doing makeup for someone who is dressed in a power suit, or a cocktail dress with stilettos, then you want to create a power makeup and hair style to match. A high ponytail or high bun is the best hair style to match this power style combined with dark eyes. Make sure you use an eyelash curler to really extend those lashes and make use of lengthening mascara to really make the eyelashes pop. Use eyeliner on the top and bottom lash line to make the eyes stand out and make a statement.
The feminine look
When working with a feminine look which includes soft curls or pretty braids, then you want to ensure the makeup you apply matches this style. For this, you're going to want to use pastels and combine that with a touch of eyeliner and extended lashes. Finish off the picture with nude lip gloss to highlight the lips and create the perfect feminine style.
Party girl
When you have a client come to you for makeup for their night out on the town, then you have to look at the party girl look. This is where you should work with the hair stylist to create a messy bun or fun hair style that really shouts night club or night out. The makeup side is easy - you can make use of glitter, but not too much. Add a small amount of glitter to add that shimmering effect and finish it off with dark lips to make a statement.
Sporty
To create a sporty look you will need to work closely with the hairstylist to get that sports hair style that shouts 'I'm off to play tennis', or 'I'm heading off to the gym'. A bun or swing ponytail is best. For the makeup you want to keep it as neutral and as simple as possible, this means using neutral tones and pastel colors which work together to create the image you want to portray. Curl the lashes, but don't add any mascara or eyeliner. Rather, hide imperfections with concealer and foundation and then add a small amount of blush to the cheeks to give that just worked out look.
18.2 Makeup Based on Hair Color
 When working with a hair stylist to ensure that the makeup complements the hair style and the hair complements the makeup, there are certain factors you need to take into consideration, such as hair color. In addition to worrying about the style, the color of the hair will impact what colors you should use and what works best with the hair color of the client to achieve the best results.
Dark brown hair
In the event your client has dark brown hair, then you want to use bold makeup colors which will make a statement. In this instance, reds, purples, plums, and golds will work wonders to create the look you are working to achieve. With dark brown hair you will find that you will get the best results using black eyeliner and bright lipsticks. Further bronze or copper eye shadows are the best choice with brown/red lips to really show off the color of the hair.
Makeup for dark brown hair
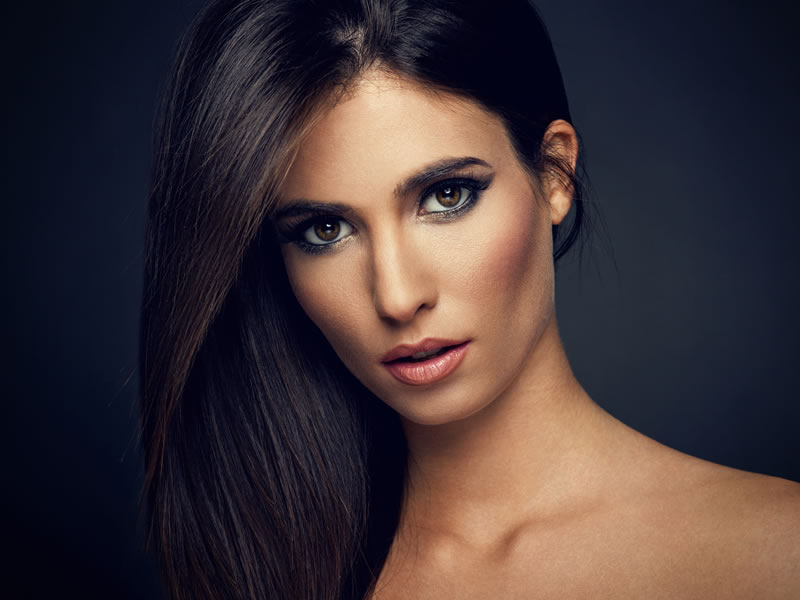
Black hair
When working with ebony black hair, then you will find that there are certain makeup options which will really stand out. Smoky eyes are a fantastic choice with this color, as is bright lipstick, but don't combine the two as this will end in disaster.
Makeup for black hair
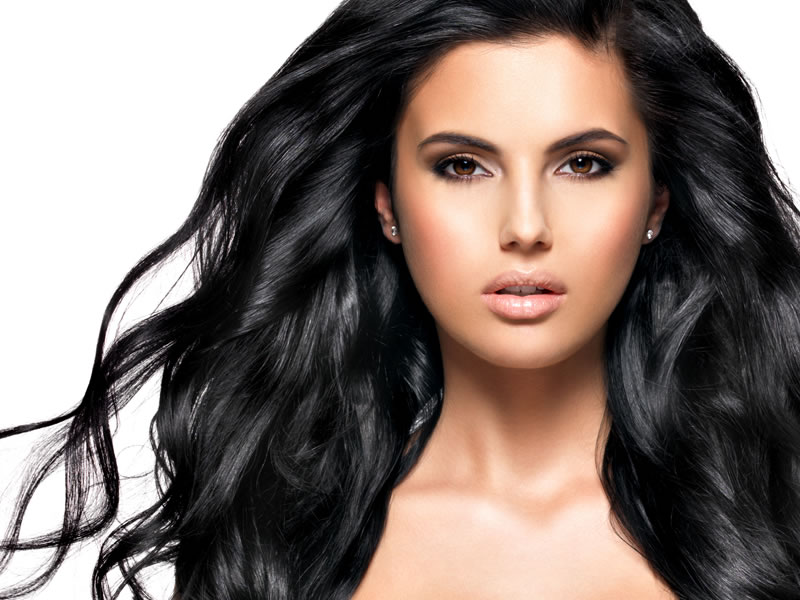
Blonde hair
When working with blonde hair you want to stick to the peaches and pinks. Red lips work well with any hair color and you won't be disappointed when creating an elegant and sophisticated look for someone with blonde hair.
Makeup for blonde hair

Red or auburn hair
Red and auburn hair deserves subtle makeup with soft greens and neutral lips and cheeks. Don't go overboard and stay away from bold colors, smoky eyes and dark tones. Keep it light and alive, enhancing the appearance of the face at all times.
Makeup for red or auburn hair

Light brown hair
When working with light brown hair you want to keep to grays and browns, enhancing the hair color while creating the best makeup for that hair color.
Makeup for light brown hair

18.3 How to Work with a Hair Stylist
Before you start the work, you both need to come up with a plan. It may be a good idea to sketch out the final look, however, if you are not able to sketch it out, you can get a computer software program that will do it for you. It can give you an idea of how you should work together to complete the look.
Once you see the hair style, you will be able to decide the proper makeup application to accentuate the style. If you aren't sure what style the hair will be, you can still create a look for your client knowing where they are going or what they are doing. The hair stylist can match the makeup style. The client may also choose their hair style and you will need to plan the makeup to match. If you are working with a hair stylist, it is worthwhile sitting down together and coming up with the overall look you are hoping to achieve. Take note of what the hair stylist has to say - they may have some recommendations, and you may have some recommendations of your own. It is important to remember that as a makeup artist, there will be times when you have to work as part of a team and this means taking on board ideas and recommendations from others.
18.4 Plan the Overall Look
 Make sure that you plan out the look first so that you have an idea of the overall desired look that you are going for. That way it can help you have an idea of the overall end goal to complete your look. There is no better way to pull it all together. You don't want to find out too late that your client is unhappy with the work. Speak to your client and ask thorough questions to identify what look they are hoping to achieve and the type of event that they are going to. This can give you ideas on what you can do, along with ideas on how their hair should be. From here you and the hair stylist can sit down together to come up with an overall plan. This brainstorming shouldn't take too much time. Once you both have a set idea in mind you can work together to ensure the hair and makeup complement each other. This is a way you will need to work, especially if you have been asked to do the makeup for a wedding, for example. You will need to know the theme of the wedding, the color of the dress, the bride's hair color and how she intends to wear her hair, to ensure that the makeup blends in seamlessly and helps make her look spectacular as she walks down the aisle.
Module summary
In this module, you got to know how you can pair hair and makeup in your business. You gained an insight into different styles and what makeup to use to complement the styles. You also learned which colors to use with what hair color. This module provided you with what you need to know about how to work with hair stylists and how to plan the style in advance to achieve the best results. Marrying hair and makeup is an important part of what you do, but with this essential advice and our useful tips you will be able to complete every project with complete confidence.
Frequently Asked Questions
To progress on to the next module of your course scroll to the bottom of the current module and press the “NEXT” button. This will take you directly to the following module.
Once you have completed the last module of the course please click on the button at the bottom of the module that says “START”. This will take you to the test.
The pass mark for the end of course test is 70%
Yes, you can re-take your test as many times as you need to.
No, once you have passed a test it is not possible to retake it.
When logging on to your course directly through our site you have lifetime access.
Click on the “My Profile” button at the top of any page on our site. This will take you to your profile page. Once there scroll down to the section headed “Edit Your Profile” and enter your new password.
Please click here to contact our student support team
If you would like to go back and view a completed module you can do this by clicking the “Course Modules” option from the side bar menu of your course. This will take you to a list of the modules contained within your course. Simply select the module you wish to study again.
Please click here to find out how to save your course modules as PDF files
Worksheets
There is no worksheets for this course.
Module PDF's
Module 1: What is Beauty and Makeup Artistry?
Module 3 : Role of a Beauty Makeup Artist
Module 4 : Skin Anatomy and Skin Care
Module 5 : Tools Used by a Makeup Artist
Module 6 : Working with Makeup Artist Brushes
Module 7 : Skin Tone: Foundation Selection and Application
Module 8 : Corrective Makeup Techniques
Module 9 : Beauty Makeup Styles
Module 11 : Eyeliner Techniques
Module 13 : False Lash Application Techniques
Module 14 : Cheek Color Application
Module 15 : Lip Color Application
Module 16 : Recent Beauty Trends
Module 17 : Makeup in TV, Film, and Magazines
Module 18 : Hair Styling for Makeup
Module 19: Maintaining Radiant Skin
Module 21: Advanced Techniques
Module 22: Salon Management – Advertising Your Services and Your Business